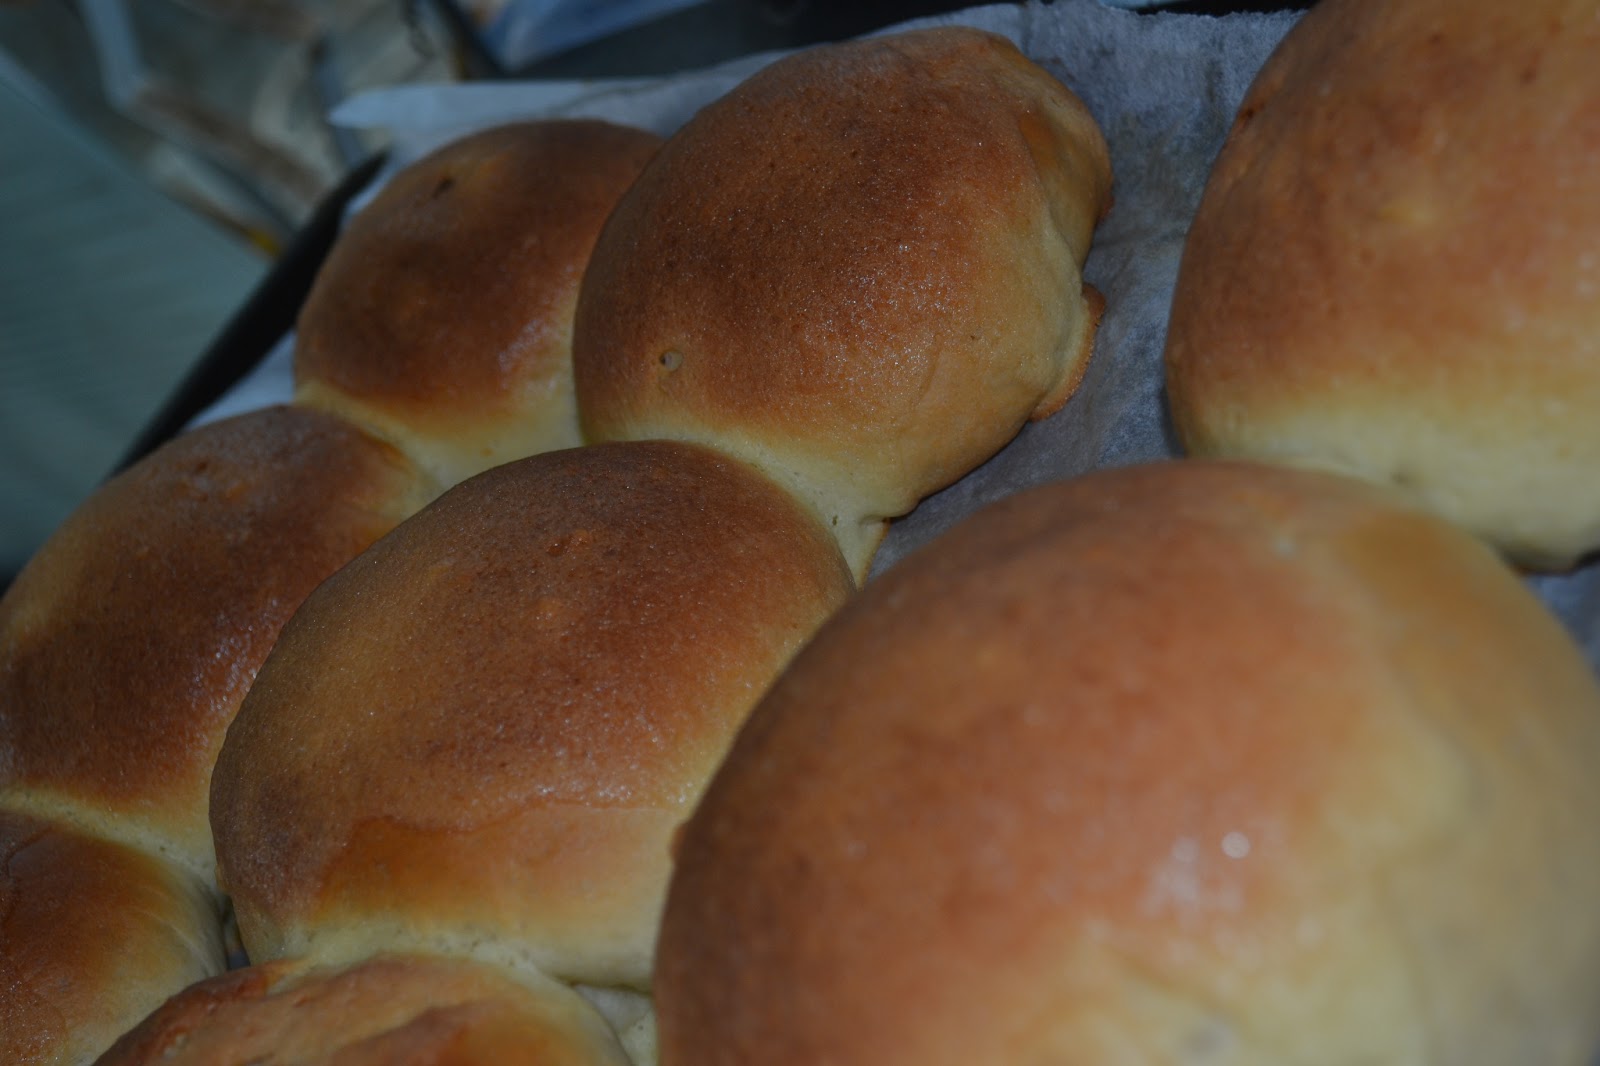
Saturday, April 27, 2013

Sunset..at miri

 photo 579787a0-7baa-45f9-a958-294c259f1c06_zps772840f2.jpg

 photo 8396841d-91d9-4e55-86b4-0814f13f4fca_zps225d373e.jpg

 photo 868d0d0f-712d-495c-82c3-ec40f52b3595_zpsb4a3ea3b.jpg

 photo b68a17f0-1225-4ed1-9cde-e2e8be392586_zps508dfd49.jpg photo 0ff66310-0801-45ea-bedf-7cc11a4c2d0d_zpsf38c0d8d.jpg photo a8259212-c461-4890-b870-974628e43b67_zpsbab906ea.jpg

Evening with Dim sum

 photo d9a0ecc2-0dfb-4485-9577-39e2ac0ddb95_zps099e2536.jpg photo 680ba3e5-b609-4d20-9a72-2805b3ad665a_zps1a0ecf79.jpg

Friday, April 26, 2013

Coconut Cream Pie

 photo 20585c86-0651-4899-899b-0457b0c94ce3_zps52dc964c.jpg

                                                                                   photo 3a57f421-0ccf-42b5-8f28-1522f4add905_zpsa5217d90.jpg    Gosshh! I  have no time to update my blog lately.... having a busy week....with kids, exam, new assessment, test...and bla..bla..blaa....but...3 days and 2 night with free luxury room is my payback time! also not to forget a very high speed WiFi line ...yummy! hahhahahaaa i will post all my 'stock' within this 2 days, insyaallah... coz my schedule will return to normal next week!...Hope to enjoy and share all the recipes...btw.. this coconut cream pie was really delicious and i will do it again..coz my toasted hawaiian coconut is in stock ...in my chiller!!!!hahhaha Enjoy!   opppss..also  bake some  pumpkin pie on same day...                                                                                       
 Coconut Cream Pie

Ingredients


1 (9-inch) blind-baked pie crust
2 oz. bittersweet chocolate chips or chunks, melted
4 large egg yolks
3 cups unsweetened coconut milk
2/3 cup granulated sugar
5 tbsp. cornstarch
¼ tsp. salt

For topping: 
1 cup heavy cream
¼ cup confectioners' sugar
1 tsp. vanilla extract
Toasted coconut curls (or toasted shredded coconut)

Directions


  Be sure the blind-baked pie crust is completely cooled before proceeding.  With a pastry brush or small spatula, brush a thin coat of melted bittersweet chocolate over the inside of the pie crust.  This will act as a barrier between the crust and the filling, preventing the crust from becoming soggy.  Chill about 10 minutes or until the chocolate is set.
To make the filling, place the egg yolks in a medium bowl     or liquid measuring cup and whisk briefly.  In a medium       saucepan, combine the coconut milk, sugar, cornstarch and salt.  Bring the mixture just barely to a simmer over medium  heat.      
Slowly add a bit of the coconut milk mixture to the bowl with the egg yolks, whisking constantly to prevent the eggs from curdling.  Continue adding until at least half of the liquid has been added to the bowl.  Return the coconut-egg yolk mixture to the saucepan and whisk to blend.  Continue to heat, stirring and whisking frequently, until the mixture begins to bubble and thicken.  The mixture should thicken significantly.  Remove the pan from the heat.  Strain through a fine mesh sieve to remove any lumps, then smooth the coconut custard in an even layer in the prepared pie shell.  Cover with a piece of plastic wrap directly on the surface of the coconut custard (this will prevent a skin from forming).  Transfer the pie plate to the refrigerator and let chill until well set, at least 4 hours.
Just before serving, combine the heavy cream and confectioners' sugar in the bowl of an electric mixer with the whisk attachment.  Whip on medium-high speed until medium-stiff peaks form, being careful not to over beat.  Blend in the vanilla.  Remove the plastic wrap and smooth the whipped cream in a fluffy layer over the coconut custard.  Top with toasted coconut as desired.  Slice and serve.
                                                                                      
 photo d8b2d65b-79d0-420d-8bf5-0ad191b1839a_zpsb54f7ac4.jpg

 photo 260413nikon004_zps71bb67c7.jpg                                                                                                                                                                                                                                                                                             

Holy Yum Chicken...

 photo 220413nikon025_zps970ff8a0.jpgIngredient
1 1/2 – 2 pounds boneless, skinless, chicken thighs 
1/2 cup Dijon mustard, 1/4 cup pure maple syrup
1 tbsp. rice wine vinegar
1/4 tsp. salt
1/4 tsp. ground black pepper
1 tbsp. cornstarch
2 tsp. fresh rosemary for garnish


 photo 18e45b39-5951-4002-8117-0926df96c5f3_zps33daa3f3.jpg
Instructions:
  1. Preheat oven to 450 degrees. Line a oven-proof pan with 2 layers of tin foil.
  2. In small bowl, whisk together Dijon mustard, maple syrup, rice wine vinegar, salt and pepper.
  3. Place the chicken thighs in the foil layered pan then pour the mixture on top of it.  Turn the chicken around in the sauce to make sure it gets all coated.
  4. Bake, uncovered, for 40 minutes.
  5. Remove from oven and let chicken sit for 5 minutes then transfer to a plate. Do NOT discard the liquid.
  6. Immediately after plating chicken, whisk in the 1 tbsp. of cornstarch into the liquid in the pan. You’ll create a nice, thick sauce to drizzle over your chicken. You need to do cornstarch mixing immediately because the liquid needs to be hot in order for it to thicken properly. If it’s still not thickening after 1 tbsp., you can add a little more.
  7. Sprinkle rosemary on top b4 served            
(Adapted from tablefortwoblog.com)

Saturday, April 13, 2013

Creamy Chicken Chops

 photo 342743cd-57ec-41af-b8ab-3d77db22169d_zpsf8be5705.jpg
1 teaspoon olive oil
1 onion, chopped
2 cloves garlic, chopped
4 whole leg chops
1 (10.75 ounce) can condensed cream of chicken soup
1/2 (14.5 ounce) can chicken broth
salt and pepper to taste

Directions

  1. Heat oil in a large skillet over medium high heat. Add onions and garlic and saute until translucent. Add chicken chops and brown about 4 to 6 minutes each side, stirring often to avoid burning onions and garlic.
  2. Meanwhile, in a separate bowl, whisk together soup and broth. Pour soup mixture over browned chops, stirring well to loosen onions and garlic and to deglaze skillet. Reduce heat and gently simmer for 10 to 15 minutes, stirring and turning chops occasionally, until chops are cooked through. An instant-read thermometer inserted into the center should read at least 145 degrees F (63 degrees C). Season with salt and pepper to taste and serve.
(allrecipe/sunny)

Wednesday, April 10, 2013

Flower rolls or huajuan or Chinese plain steamed buns

Flower rolls or huajuan or Chinese plain steamed buns

First time i found  this recipe ...I've  straight away booked  my diary! The taste like Chinese steam pau , it's not really difficult to make it,...and it's cute too!..but my kids not really like coz..i don't put any filling .. next time i will put some ....


 photo 438de13d-6c5b-4bb2-803b-7d9add5aeee1_zps97310359.jpg
Ingredients
400g special white flour, or plain flour
1/8 teaspoon salt
20g caster sugar
6g instant dry yeast
210ml lukewarm water, adjust as necessary
1/4 teaspoon strawberry paste, or a few drops red food colouring, adjust as necessary for desired hue
Baking paper, or patty-tin paper cases
Preparation
1. If you are using the baking paper as bases for the steamed buns, cut the paper into rounds about 8cm in diameter. Set aside.
2. Sift flour, salt and caster sugar onto the working surface. Add instant dry yeast and stir into the flour mixture; mixing well. Form the flour mixture into a well. Add colouring. Gradually add just enough lukewarm water to form into a slightly sticky, soft dough. Knead for 10 minutes, adjust with more flour or water if the dough feels too wet or too dry.
3. Form the dough into a round ball and let it rise until double in size in a large greased bowl, cover with cling film (should take about 1 hour in warm weather, longer in winter months).
4. Punch down, knead briefly and divide into 6 equal portions of about 110g each. Form each portion into a log and divide again equally into 5 portions of about 22g each. You should end up with 30 small portions. Form each piece into a ball and let rest for about 10 minutes (depending on how fast you work, by the time you finish rounding the last portion, the first portion would have rested enough time and should be ready to be shaped), covered loosely with cling film.

5. Roll out each ball with a small rolling pin into a thin round sheet about 8cm in diameter, with the centre slightly thicker than the edges if possible. Working with 5 sheets at a time, place the first sheet nearest to you on the working surface, place the next sheet on top of the first sheet but slightly further away from you so that it covers about half of the first sheet. Repeat lining up the next three sheets in the same way until you have a row of 5 sheets. Press the sheets together lightly so they stick together.

6. Starting from the top sheet, furthest away from you, roll the row of 5 sheets towards you like a Swiss roll. Using a chopstick or a dough scraper, cut the roll in the centre into 2 equal half pieces, using a to-and-fro sawing action. Turn the pieces upright so they resemble rosebuds.

7. Place each rosebud on a piece of the prepared baking paper round, or patty-tin paper case. Cover loosely with cling film, and let rise for about 10 to 20 minutes, or until they feel just puffy. Try not to rest too long for this final rise, or the rosebud shapes might be distorted if they rise too much. In the meantime, start boiling water in a steamer.
8. Steam the rosebud buns for about 15 minutes over moderate heat. When done, turn off the heat but do not remove the lid of the steamer, and let the buns sit inside for a further 3 minutes (this is to prevent the buns from shrinking). Then remove and serve hot.
(Adapted from: cornercafe.wordpress)

Soft Plain Roll

Soft Plain Roll

I follow exactly the recipe and the direction..and the result..fantastic!
 photo 2878ab1f-d556-4c54-b7a4-3978604bd694_zps11c1fd50.jpg


Ingredients
Overnight Poolish:
150g bread flour
150g lukewarm water
0.5g (1/8 teaspoon) instant yeast
Main Dough:
250g bread flour
100g cake flour (or plain flour if desired)
15g milk powder
50g caster sugar
6g (1 1/4 teaspoons) salt
5g (1 1/4 teaspoons) instant yeast
1 egg, lightly beaten
75g (approx.) lukewarm water, adjust as necessary
50g butter, cut into small cubes

Preparation

1. For the poolish, mix all ingredients in a mixing bowl together until incorporated . Cover with cling film and let it prove for about 1 hour in a warm place , then place into the refrigerator to chill (preferably at 5°C but not strictly, a couple of degrees off is still fine) for at least 16 hours  it should be bubbly at this stage. Let poolish return to room temperature, about half an hour, before using.

2. Sift bread flour, cake flour, milk powder, caster sugar and instant dry yeast onto the working surface and mix well. Form the flour mixture into a well and add lightly beaten egg, room-temperature poolish and salt, then gradually add just enough lukewarm water to form into a slightly sticky, soft dough. Knead for 10 minutes until smooth and elastic. (You can do the kneading in a breadmaker if you own one.) If you are kneading by hand, the dough also needs to be thrown onto the working surface once every few minutes between kneading to improve the dough structure. (I usually just pick up the dough to about head-high and throw it down onto the working surface 10 to 20 times every few minutes between kneading.)

3. Finally knead in the room-temperature butter, a cube at a time, until incorporated. (In many cookbooks, they mentioned that the dough at this stage should be able to be pulled and stretched into membrane – “window pane test”, but it’s hard to achieve with hand kneading because the dough does not heat up as much as when using machine. I usually stop kneading when the dough stretches like chewing gum when pulled!) Form the dough into a round ball and let it rise in a warm place (preferably at about 26°C – 28°C) until at least double or nearly triple in size in a large greased bowl, covered with cling film (should take about 1 hour in optimum warm temperature, longer in winter months). To test if the dough has risen properly, dip a finger into bread or plain flour and poke down into the center of the dough as far as your finger will go and pull out again – the hole should remain if it is ready. If the dough springs back, then it is not ready, continue to prove further.

4. Punch down, knead briefly and form into a ball shape. Then divide into 12 or 16 equal portions. The easiest way is to first divide equally into 4 larger portions first, then divide each of these again into thirds (for 12 portions) or quarters (for 16 portions) each. Form each into balls and let rest for 10 minutes.

5. Shape and fill the buns according to recipe. Place all finished buns on a greased baking sheet, lightly cover with cling film, and let rise in a warm place until double in size (about 1 hour in warm weather, longer in winter months).

6. Brush with egg wash if the recipe calls for it and bake in preheated 190°C oven for about 12 to 15 minutes, or until golden brown.
 
 photo 080413nikon022_zpsf8c57888.jpg
Soft Plain Rolls
To shape plain rolls (for 12 portions):

1. Follow preparations as above up to step 4. Roll each dough ball into carrot shape of about 15cm long . Roll out using a rolling pin to about 30cm length , then roll up from the wider end like shaping a croissant

2. Place the shaped rolls evenly apart, sealed ends down, on a greased or lined 30cm × 25cm slice tin or baking tray , lightly cover with cling film, and let rise in a warm place until double in size. Brush with eggwash (using one lightly beaten egg) and bake in preheated 180°C oven for about 22 minutes, or until golden brown.
(Adapted from cornercafe.wordpress)

Baked Pumpkin Oatmeal

Baked Pumpkin Oatmeal...

 photo 8606991b-ce2c-43d8-86f4-09412de9d463_zpsb8fef057.jpg


I will do it again! This recipe is the best...really like it....the  taste of oat and pumpkin ummph! thumbs up!!..next,  i will add some raisin, serve with roasted walnut and honey...Hubby ate this for dinner....
Ingredient
2 sugar pumpkins (i use one only....)
1 tablespoon melted butter or canola oil
1 teaspoon baking powder
1/2 cup unsweetened apple sauce
1 teaspoon ground cinnamon
2 tablespoons brown sugar
2 cups old fashioned oats
1 egg
3/4 to 1 cup lowfat milk (depending on how milky you like your oatmeal)
1 granny smith apple (peeled + diced small)
extra brown sugar for sprinkling
extra milk for splashing (optional) 
Method
Preheat oven 375 degrees. Start by carefully cutting the top off your pumpkin and cleaning the insides out. (Save the seeds for later – recipe to come!)
Combine all remaining ingredients (except the sugar for sprinkling and milk for splashing) in a large bowl. Stir well and divide batter evenly between the two pumpkins.  Sprinkle lightly with brown sugar.  Place both pumpkins on a cookie sheet and bake for 45 mins to an hour or until pumpkin is soft enough to scoop and oatmeal is done.  After it was done, we added a splash of milk. Remember: When doling out scoops be sure to scrape up some of that baked pumpkin goodness with the spiced oatmeal. Makes 4 servings.
We cooked the pumpkin with the top off for the first 20 mins and then put the top on loosely (allowing for steam to come out) for the rest of the baking time. If you choose to cook with top on, make sure that the stem soaked in some water and that it is far enough away from the heat source. You can also cook it with the top off the entire time – the oatmeal will still come out tasting great.
(Adapted from cookingwithmykids)

Applesauce

Ingredients

3 to 4 lbs of peeled, cored, and quartered apples. (Make sure you use a good cooking apple like Golden Delicious, Jonagold, Granny Smith, Fuji, Jonathan, Mcintosh, or Gravenstein.)
4 strips of lemon peel - use a vegetable peeler to strip 4 lengths
Juice of one lemon, about 3-4 Tbsp
3 inches of cinnamon stick
1/4 cup of dark brown sugar
up to 1/4 cup of white sugar
1 cup of water
1/2 teaspoon of salt

Method

1 Put all ingredients into a large pot. Cover. Bring to boil. Lower heat and simmer for 20-30 minutes.
2 Remove from heat. Remove cinnamon sticks and lemon peels. Mash with potato masher.
Ready to serve, either hot or refrigerated. Delicious with vanilla ice cream or vanilla yogurt.
Freezes easily, lasts up to one year in a cold freezer.
(Adapted from cookingwithmykid)

Mexican Bun

 photo 238392c1-ac7a-4ac3-b6e9-ab7cdc614880_zpsc2db449d.jpgMexican Paste Topping
50g butter, softened
50g caster sugar
1 egg
50g plain flour

Method
1. To prepare the Mexican Paste: Cream softened butter and sugar until pale. Beat in egg to combine. Stir in flour until smooth. Transfer to a small freezer/snack bag with a tiny cut at one corner for piping (or use a piping bag fixed with a 1/2cm or smaller round nozzle).


Bun Dough Ingredient
375g bread flour
100g plain flour
35g milk powder
75g caster sugar
3/4 teaspoon salt
1 sachet (7g or 2 1/2 tsp) instant dry yeast
1 egg, lightly beaten
150ml (approx.) lukewarm water, adjust as necessary
40g butter, cubed
Water-Roux Paste
25g (just under 2 tbsp) bread flour
125ml (1/2 cup) water
* Water-Roux is basically 1 part bread flour to 5 parts water.


Water-Roux
Mix flour and water in a small saucepan. Cook over low to medium heat, stirring continuously until it reaches 65ºC. It should have thickened to a paste at this stage, that is when you stir you can see the bottom of the pan. Remove from heat, place a cling film over the paste and leave until lukewarm, or room temperature, before using. (Alternatively if you don’t have a thermometer, cook as before until it starts to thicken, then continue to cook for about 1 more minute before removing from heat.) This water roux can be kept in an airtight container after cooling in the refrigerator for 1 day if not used immediately. However DO NOT USE if it turns grey in colour, that means it has gone bad.


For the Bun Dough:
1. Sift bread flour, plain flour, milk powder, caster sugar and salt onto the working surface. Add instant dry yeast and mix well. Form the flour mixture into a well. Add lightly beaten egg and lukewarm water roux and mix in. Gradually add just enough lukewarm water to form into a slightly sticky, soft dough. Knead for 10 minutes until smooth and elastic. During hand kneading, the dough also needs to be thrown onto the working surface once every few minutes between kneading to improve the dough structure. (I usually just pick up the dough to about head-high and throw it down onto the working surface 10 to 20 times every few minutes between kneading.)
2. Knead in butter until incorporated. (In many cookbooks, they mentioned that the dough at this stage should be able to be pulled and stretched into membrane, but it’s hard to achieve with hand kneading. I usually stop kneading when the dough sticks to the work surface and stretches like chewing gum when pulled!) Form the dough into a round ball and let it rise until double in size in a large greased bowl, cover with cling film (should take about 1 hour in warm weather, longer in winter months). Optimum room temperature for this first prove is 28°C with a humidity of 75%. To test if the dough has risen properly, dip a finger into bread or plain flour and poke down into the centre of the dough as far as your finger will go and pull out again – the hole should remain if it is ready. If the dough springs back, then it is not ready, continue to prove further.
3. Punch down, knead briefly and form into a ball shape. Then divide into 16 equal portions. The easiest way is to first divide equally into 4 larger portions first, then divide each of these again into quarters each. Form each into balls and let rest for 10 minutes.
  photo 080413nikon004_zps7666f2ef.jpg
4. Shape and fill the buns according to recipe. Place all finished buns on a greased baking sheet, lightly cover with cling film, and let rise until double in size (about 1 hour in warm weather, longer in winter months). Optimum room temperature for this final prove is 38°C with a humidity of 85%.
5. Bake in preheated 190°C oven for about 12 to 15 minutes, or until golden brown.
(Adapted from, cornercafe.wordpress)